WP Rocket Review
There are many WordPress plugins that only some websites need. And then, there are some plugins that every WordPress site needs. A cache and performance optimization plugin falls sharply into the latter field.
Because performance is so important – affecting everything from user experience to Google rankings and conversion rates – everyone who wants their website to succeed needs to ensure it loads quickly.
When it comes to caching plugins, WP Rocket is one of the most popular options. Although it labels itself as a caching plugin, WP Rocket also includes several minor performance optimization features to go along with caching.
In 2021, the WP Rocket team also released some features specifically designed to help you improve your site’s Core Web Vitals metrics to comply with the new Google Page Experience Algorithm update.
But in a world of free caching plugins like W3 Total Cache and WP Super Cache, is WP Rocket worth paying for?
This is what I intend to find out in my WP Rocket review.
Join me for a look at some real performance data, a tour of the WP Rocket dashboard, and my thoughts on whether WP Rocket’s features are worth its price.
Index
WP Rocket is more than just a caching plugin
Putting WP Rocket to the Test – Actual Performance Data
How to optimize your website with WP Rocket
How much does WP Rocket cost?
WP Rocket Review – Final Thoughts
WP Rocket is more than just a caching plugin
Page caching is one of the best things you can do to speed up your WordPress site.
But here’s the thing:
There are many popular free WordPress caching plugins, which means that in order for WP Rocket to justify its premium pricing, it needs to find a way to differentiate itself from these free options.
WP Rocket tries to do this in three ways:
User Interface – WP Rocket offers a beginner-friendly interface that is easier to use than many other caching plugins.
Unique Features – In addition to handling page caching and other basic optimizations, WP Rocket offers some unique features that you won’t find in other WordPress performance plugins. These features can make significant improvements to your site’s performance.
Support – As a premium plugin, WP Rocket offers dedicated support to help you use the plugin and configure it on your website.
You’ll see how the interface is designed a little later, but let me quickly lead with some of these other optimization tweaks, because I think that’s where most of WP Rocket’s value comes from.
Here are some of the “standard” optimizations you get. As you can find these features in some other optimization plugins, I don’t consider them the biggest differentiators:
Minification – reduces the size of your site’s code by removing unnecessary content, such as whitespace, without changing the code’s functionality.
Combine files – does what it says! Combines multiple files (eg multiple CSS files) into a single file. Personally, I don’t recommend using file combining if your host supports HTTP/2. Instead, you’ll want to use some of WP Rocket’s unique features.
Render-blocking CSS/JS – helps you get rid of the famous “Eliminate render-blocking resources” warning in Google PageSpeed Insights.
Slow loading – speeds up your site by loading only certain media content when it enters the visitor’s preview window. Essentially, your site will not load images and/or videos until absolutely necessary.
Easy CDN Integrations – helps you connect to CDNs (Content Delivery Networks) like Cloudflare, or you can use WP Rocket’s official CDN service.
Database Optimizer – Allows you to clean up your database directly from the WP Rocket UI, instead of requiring you to install a separate plugin.
Heartbeat Control – allows you to take control of the WordPress Heartbeat API.
As I mentioned above, you can find these features in some other WordPress optimization plugins. But where WP Rocket goes the furthest is in these two features they released in late 2021:
Remove Unused CSS – This feature allows you to remove unused CSS page by page. Personally, I’ve noticed that this can easily reduce the file size of a page by over 100KB.
Delay JavaScript Execution – This feature allows you to improve homepage load times by delaying JavaScript execution until a user interaction (for example, a click or scroll). You can also manually exclude certain JavaScript files to avoid problems.
I don’t know of any other WordPress plugin that offers these features. I’m not saying it doesn’t exist – but I can’t think of
no other popular plugin that can fully match the WP Rocket feature list.
So – do these features really lead to a faster WordPress site? Let’s look at the data.
Putting WP Rocket to the Test – Actual Performance Data
As WP Rocket aims to improve your website performance, it wouldn’t be a WP Rocket review without some real test data.
Since all the features I listed above are a moot point, if WP Rocket doesn’t make your site faster, I’m not going to make you wait to take a look at the data.
Here’s how I’m going to test the performance of WP Rocket:
I set up a non-optimized staging site hosted on a $5 DigitalOcean droplet (managed by RunCloud). He’s using our lightweight Airi theme along with a demo site complete with the Elementor page builder plugin. Airi itself is very light, but Elementor obviously adds some weight, so that should give WP Rocket a good test.
First, I’m going to test the site’s unoptimized performance. So I’m going to configure WP Rocket and see how the performance changes.
For both tests, I will use WebPageTest to collect the data. To collect accurate and useful data, I will configure it as follows:
Ashburn VA Test, which is close to my DigitalOcean data center.
Run nine separate tests and get the median value.
Use a throttled FIOS connection – this results in “slower” load times than non-throttling tools like Pingdom, but I think it provides a more reliable indicator of real-world performance.
After sharing all this data with you, I’m going to take you through the WP Rocket interface and show you the settings and features that make up the plugin.
That way, you’ll know more than just the features of WP Rocket – you’ll also know how those features translate to real-life performance.
Ready to take the tests?
Here’s How My Test Site Performed Before WP Rocket
Before installing WP Rocket, see how my unoptimized site performed on WebPageTest – this is the average result of nine separate tests. If you can’t see the data, I’ll show it in table format in a second.
WP Rocket cuts page load times by 50%+
After optimizing my test site with WP Rocket, the page load time dropped by well over 50% in both tests.
The biggest improvements came in the reduction of TTFB (Time To First Byte). On a more powerful server, you might not notice such a dramatic improvement. However, my small DigitalOcean server had a pretty rough TTFB at first, but WP Rocket fixed that completely.
WP Rocket also made improvements beyond that, reducing the page size by over 200KB and dropping HTTP requests from 47 to 17.

How to optimize your website
How to optimize your website with WP Rocket
Okay, now you know that WP Rocket really does a good job of speeding up your WordPress site. But how does he actually do it?
To show you what’s going on under the hood, I’m going to take you through the WP Rocket interface now.
But first – here’s the part about WP Rocket that’s pretty cool:
WP Rocket starts working from the second you activate it, which means you get most of the benefits without having to do anything or check the settings:
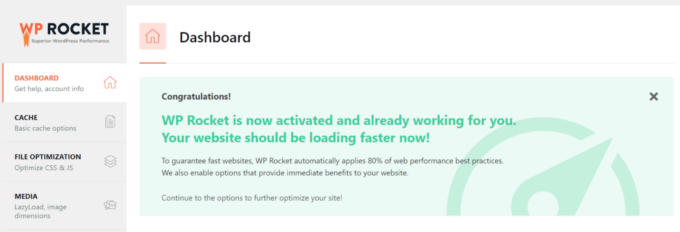
If you’ve ever tried setting up W3 Total Cache, WP Rocket will feel like a breath of fresh air.
In fact, this ease of use is one of the big things to help justify the price of WP Rocket, especially for beginners. Without configuring a configuration, you already have:
page cache
browser cache
GZIP compression
These three alone will give you a huge performance boost.
All other minor settings are optional tools that can further increase your performance.
However, if you are a beginner and don’t know what they mean? Well, you could technically never look at the WP Rocket interface and still enjoy a massive speed boost, which… well, that’s not the case with W3 Total Cache (trust me, I had to write 3,500-word tutorials on how to configure W3 Total Cache ).
If you want to get into the guts of the plugin though, here’s what’s happening in the dashboard.
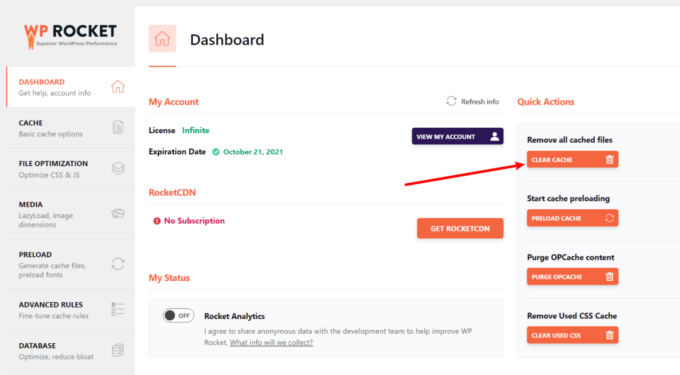
dashboard guide
The Dashboard tab does not contain any important settings, but allows you to perform important actions. Specifically, you can clear the entire cache, start the cache preload, and clear the used CSS cache (which only applies if you are using the “remove unused CSS” feature).
For example, if you’ve recently made a big change to your site, you might want to clear your entire cache so your visitors see that change right away. After clearing the cache, you can start the cache preload to put these pages back in the cache:
Now, let’s dive into some of the actual settings.
Cache tab
The Cache tab allows you to configure some basics about how your site’s cache functionality works:
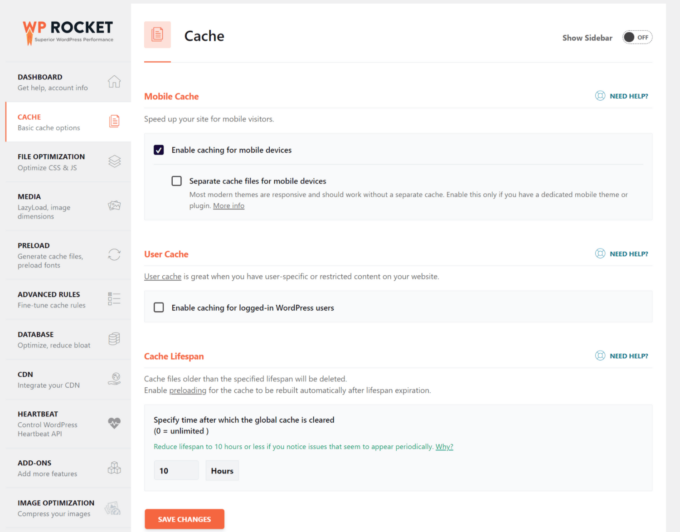
Specifically, you can choose to:
Enable caching for mobile visitors and, if enabled, also create a separate cache for mobile visitors. If you want to use mobile caching, WP Rocket and I recommend enabling both settings to ensure mobile visitors have an optimal experience.
Enable caching for connected users . WP Rocket will create a separate cache for logged in users, which is great if you have restricted content that users need to be logged in to see. If you don’t have registered users on your site, I recommend leaving this out.
In addition, you can also choose the cache lifetime, which is how long WP Rocket stores the cached version of a page before removing it. By default, it’s 10 hours, but you can make it longer or shorter according to your needs.
For example, if your site practically never changes, you might want to tell WP Rocket to cache files longer.
A quick note here. If you’re not sure what a particular setting does, click the “Need Help” button to open a help window directly from your WordPress dashboard. This dashboard help is part of what makes WP Rocket so easy to use.

File Optimization Guide
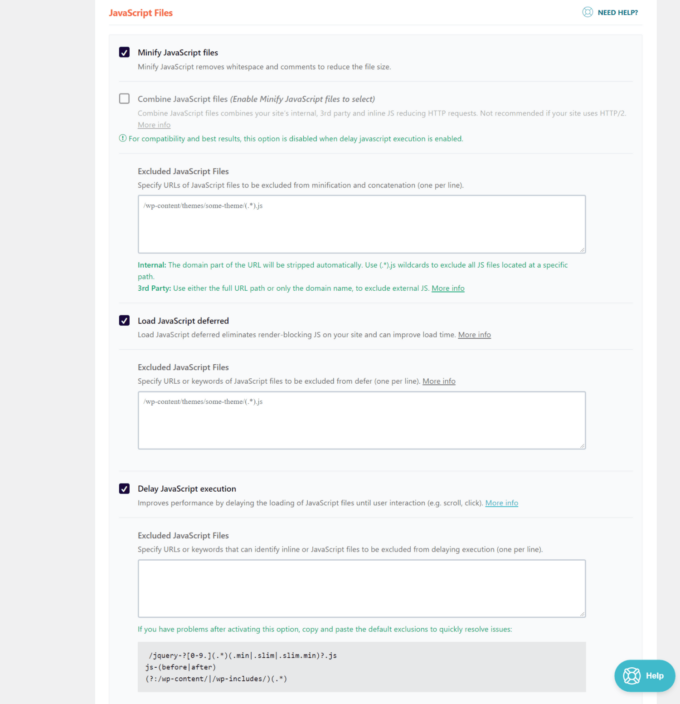
Next, the File Optimization tab contains various settings that allow you to optimize your website’s CSS and JavaScript code. This is also the tab that houses WP Rocket’s most unique features – the ability to remove unused CSS and delay JavaScript execution.
For your website’s CSS code, you get the following options:
Minimize CSS files
Combine CSS files – I don’t recommend using this if your host uses HTTP/2 (WP Rocket agrees).
Optimize CSS delivery – You can use the new “remove unused CSS” feature or choose to load CSS asynchronously.

For JavaScript, you get the following options:
Minimize JavaScript files
Combine JavaScript files – As with CSS files, I don’t recommend using this option if your host uses HTTP/2. Also, you cannot enable it if you are using the “delay JavaScript execution” feature.
Deferred JavaScript Load – This can help with render-blocking warning in tools like PageSpeed Insights.
Delay JavaScript Execution – This is the new feature I explained above. If you have important scripts that must be loaded immediately, specify them here to avoid problems.
To help you delete JavaScript files, WP Rocket maintains a documentation page with common files you want to delete for various services and plugins. I recommend checking this page if you use the “delay JavaScript execution” feature.
Media tab
The Media tab helps you speed up images, videos and other media files on your site by implementing a few different strategies, especially lazy loading.
With lazy loading, your site will wait to load certain content below the fold until a visitor starts scrolling. You can enable lazy loading separately for:
Images
iframes and videos
If you embed a lot of YouTube videos, you’ll also love the ability to replace the YouTube embed with a static preview image. This can make a big difference to your page load times, as WordPress will wait to load the actual YouTube embed until a visitor clicks on the preview image:
You can also automatically add missing image dimensions, which will help prevent layout changes and improve the Cumulative Layout Offset (CLS) metric in Google’s top web metrics.
In the past, WP Rocket also allowed you to disable WordPress emojis and embeds, but they removed those features in WP Rocket 3.10 as they don’t make much of a difference.
Preload Guide
The Preloading tab helps you implement cache preloading.
With most WordPress caching plugins, a page is only loaded into the cache after a person visits the page, which means that the first visitor after each cleanup does not receive a cached version of the page.
If you have posts or pages that receive infrequent traffic (even high-traffic websites will have these types of posts), this is not good for your site’s performance.
The Preload tab helps you change this by “preloading” your content into the cache, even if it hasn’t been visited yet.
WP Rocket allows you to implement preloading at two different levels:
Enable Preload – WP Rocket will only preload your homepage and all links found on your homepage.
Enable sitemap-based cache preloading – WP Rocket will preload your entire site, based on your sitemap. This may require more resources and most sites probably don’t need to do this.
This tab also allows you to prefetch DNS requests and sources, which can help you make important files load faster.

Advanced Rules Guide
If you are a casual user, you can skip the Advanced Rules tab.
Basically, this tab gives you more control over exactly what content is cached, who sees the cached content, and when certain content is removed.
You may:
Specify URLs to never cache, including wildcards. For example, I tend to delete my contact form page from the cache, because the cache can cause problems with some form plugins.
Exclude certain cookies or user agents from being served with cached content.
Specify URLs to always clear whenever you update any post or page.
Forces caching for specific query strings.
Database tab
As your WordPress site ages, your database picks up all sorts of “gunk” in the form of post revisions, auto-drafts, and other content that isn’t necessary for your site to function.
The Database tab allows you to clean up your database and remove all irrelevant details:
While, like some of the other features, there are free plugins that can do this for you, you are, again, essentially paying for the convenience of having everything under one roof.
And one thing I especially like about the database area of WP Rocket is that you can schedule your database cleanup to run automatically.
CDN guide
The CDN tab helps you use a content delivery network (CDN) to speed up your website’s overall load times. WP Rocket can help you use a CDN in two ways:
You can easily integrate with WP Rocket’s official RocketCDN service, which is powered by StackPath’s global network. This is a paid service that costs $7.99 for unlimited bandwidth. This price is affordable for a high-traffic site, but can be more expensive than other services for low-traffic sites.
You can integrate with a third-party CDN service such as KeyCDN, StackPath, Amazon CloudFront, and so on. More specifically, you can tell WP Rocket to serve all your image files from a subdomain (e.g. cdn.yoursite.com) instead of your root domain (e.g. yoursite.com).
The cool thing is that you can create separate rules for:
All files
Images
CSS and JavaScript
CSS only
JavaScript only
Also, you can manually exclude certain files from being served by the CDN.

heart rate guide
The WordPress Heartbeat API is an always-running feature that helps with important actions. For example, it is responsible for the post auto-save feature in the WordPress Editor.
However, as it is always running, it can also strain your server resources.
The Heartbeat tab allows you to:
Reduce the frequency of the Heartbeat API
Completely disable the Heartbeat API
You can also create different rules for different parts of your site:
Add-ons tab
The Add-ons tab houses a few different add-ons for:
Varnish
WebP Compatibility
anaconda
cloudflare
WP Rocket used to offer add-ons to locally host tracking scripts for Google Analytics and Facebook Pixel. However, they removed these add-ons in WP Rocket 3.9 because they were made redundant by the new “JavaScript execution delay” feature.
The Varnish add-on allows you to clear Varnish’s cache every time you clear WP Rocket’s cache. The add-on Sucuri does the same thing for the Sucuri cache.
If you are using WebP images, the WebP Compatibility add-on configures WP Rocket to work well with WebP images.
Finally, the Cloudflare add-on allows you to sync the Cloudflare cache and control some Cloudflare settings directly from your WordPress dashboard.
If you enable the Cloudflare add-on, you will get a new settings area for Cloudflare:
How much does WP Rocket cost?
WP Rocket starts at $49 for a single site license. In total, there are three different price plans. The only difference between the plans is the number of sites supported — there are no feature limitations:
Each plan includes one year of support and updates. It’s worth noting, however, that you get 30% off renewals if you want to continue receiving support/updates after the first year.
WP Rocket also offers a 14-day refund policy in case you are not satisfied with the plugin.